To make a longboard out of wood, you need to gather materials, shape the board, sand and finish it. Making a longboard out of wood involves several steps, from gathering the necessary materials to shaping the board and applying a finishing coat.
With the right tools and a bit of patience, you can create a functional and attractive longboard that will provide hours of ride time. In this article, we’ll go over each step in detail and provide tips and tricks for making a longboard that suits your needs and style. Whether you’re a seasoned woodworker or a beginner, this guide will help you create a custom longboard that will turn heads on the street.

Credit: www.wikihow.com
Choosing The Right Wood
Longboarding is an exciting activity that has become increasingly popular over the years. If you’re looking to make your own longboard out of wood, choosing the right wood is crucial. The type of wood you choose will impact the overall durability, weight, and flexibility of your longboard.
In this section, we’ll discuss the types of wood suitable for longboards, the properties of each type, and the factors to consider when selecting wood.
Types Of Wood Suitable For Longboards
There are several types of wood suitable for making longboards.
- Maple: this is the most common type of wood used for longboards. Maple is strong, durable, and has excellent resilience. It’s also relatively affordable compared to other types of wood.
- Bamboo: bamboo is an environmentally friendly option that’s lighter and more flexible than maple. It’s also known for its strength and durability.
- Birch: birch is a lightweight and flexible wood that’s great for cruising and carving. It’s not as strong as maple but still provides good durability.
- Oak: oak is a dense and heavy wood that’s perfect for downhill longboarding. It provides excellent stability and is highly durable.
- Mahogany: mahogany is a luxurious and durable wood that provides an excellent ride experience. It’s often used for longboard decks with intricate designs.
Properties Of Each Type Of Wood
Each type of wood has unique properties that make it suitable for longboards.
- Maple: stiff and dense, maple is durable and highly resistant to wear and tear. It also provides excellent stability at high speeds.
- Bamboo: lightweight and flexible, bamboo has a natural shock-absorbent quality that makes it perfect for longboards. It also has a high strength-to-weight ratio, which provides good durability.
- Birch: lightweight and flexible, birch is ideal for cruising and carving. It’s less stiff than maple but still provides good durability and a comfortable ride.
- Oak: heavy and dense, oak provides excellent stability at high speeds. It’s less flexible than other types of wood but highly durable.
- Mahogany: rich in color and highly durable, mahogany provides a smooth ride with excellent shock absorption. It’s also resistant to moisture and insects.
Factors To Consider When Selecting Wood
When choosing the right wood for your longboard, here are some important factors to consider:
- Rider weight and riding style: heavier riders and aggressive riders require stronger and stiffer wood whereas lighter riders and cruisers can opt for more flexible wood.
- Deck shape and size: the shape and size of your longboard deck will impact the type of wood you choose. Downhill longboards require stiffer and heavier wood whereas cruising longboards can have more flexible and lighter wood.
- Budget: your budget will also impact the type of wood you choose. Maple is the most affordable option, whereas mahogany is the most expensive.
- Personal preference: ultimately, the type of wood you choose should align with your personal preferences and the riding experience you’re looking for.
Choosing the right wood is an important step in making a longboard that’s durable, stable and provides an excellent riding experience. With the variety of options available, you’re sure to find the perfect type of wood to create your ideal longboard.
Designing The Longboard
Building a longboard out of wood requires a lot of planning and preparation. One of the most important steps in the process is designing the longboard. Here’s how to do it.
Selecting The Shape And Size Of The Board
The shape and size of the longboard are important factors that determine its performance.
- Determine the riding style: the shape and size of the board will depend on the type of riding you plan to do, such as cruising, carving, downhill, or freestyle.
- Consider your weight and height: the board should be sized according to your height and weight to ensure maximum stability and comfort.
- Look at various designs: there are numerous longboard designs to choose from, so take your time to research and choose the one that suits your needs.
Drawing A Template
Once you’ve decided on the shape and size of your longboard, the next step is to draw a template.
- Use a large sheet of paper: use a sheet of paper that is large enough to accommodate the entire longboard design.
- Trace the design: use a pencil to trace the longboard design onto the paper. Make sure the design is symmetrical.
- Mark the truck locations: the location of the trucks is crucial for the stability and performance of the longboard. Mark the truck locations accurately on the template.
Cutting The Rough Shape Of The Board
With the template in hand, it’s time to start cutting the rough shape of the board.
- Use a saw to cut the outline of the board: use a saw to cut the outline of the board according to the template. Be sure to make smooth and accurate cuts.
- Use a planer to smooth the surface: use a planer to smooth the surface of the board and remove any rough spots. Make sure the board is completely smooth before moving on to the next step.
By carefully designing your longboard, you can ensure that it performs well and suits your style. With the shape and design finalized, it’s time to move on to the next step in the process.
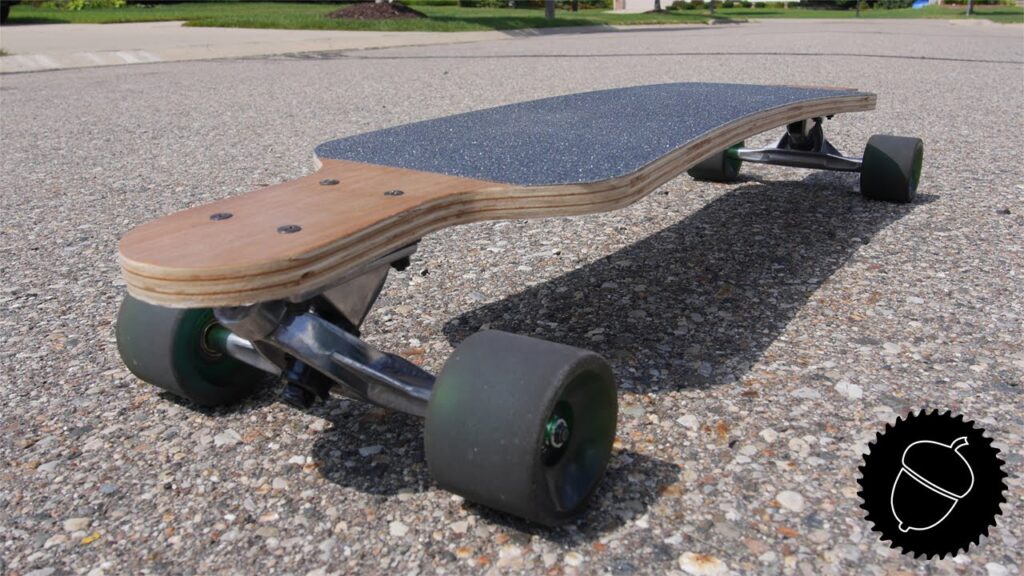
Make a Longboard // Easy Flat Style
Shaping And Sanding
Ready to shape and sand your longboard? These two processes will determine the look and feel of your board, so it’s important to take your time and follow the steps carefully.
Using A Router And Shaping Tools
- Start by using a router to create the basic shape of your longboard. Place the board on a work table and clamp it down to prevent it from moving. Then, using a pattern as a guide, cut the shape of the board with your router.
- Once you’ve shaped the longboard, use a variety of shaping tools to smooth out the rough edges and refine the curves of your board. These tools can include sanders, hand planes, and scrapers.
- Use a glassing technique to protect the longboard. This will also give the board a sleek, professional finish.
Sanding The Board
- Sanding is a crucial step in the longboard-making process. It’s important to thoroughly sand the board to ensure that it’s smooth and free of any rough spots or imperfections.
- Start sanding the board with a coarse grit sandpaper to remove any roughness. Then, move on to a finer grit to smooth out the surface and create a polished finish.
- Sanding should be done in stages, starting with a coarse grit paper, and gradually moving towards a finer one as you progress.
- As you sand the board, be sure to wipe down the surface with a damp cloth to remove any sawdust that may have accumulated.
Finishing Touches
- Once you’ve sanded the board to a smooth finish, it’s time to add the finishing touches. This may include applying a coat of finish or sealant to protect the wood and give it a polished look.
- You may also want to add graphics or designs to your longboard using paint or decals.
- Finally, add the wheels, trucks, and bearings to your longboard, and take it out for a spin!
By following these steps, you’ll be able to create a beautiful, customized longboard out of wood that is both functional and stylish. Take your time and enjoy the process – your longboard is sure to be a conversation starter wherever you go!
Applying Graphics And Coating The Board
Longboarding is quickly becoming one of the most popular outdoor activities for individuals of all ages. It is a great way to enjoy the outdoors while getting exercise at the same time. The best part about longboarding is that it is possible to build your customized board from scratch.
Creating The Graphic Design
Before applying a graphic design, you have to decide on the design you want to use. This can be something simple like stripes, or something more elaborate like a full-on graphic. Consider using adobe illustrator or any other graphic design software to generate the design you desire.
- Begin by sketching out your design on paper, and bring it into adobe illustrator
- Select your preferred colors to use in your design
- Use the pen tool to create shapes and lines
- Add any text and make sure it complements the design harmoniously
Applying The Graphic
Once you have the perfect design, it’s time to apply it to the longboard. Keep the following tips in mind.
- Create a stencil of your design
- Sanding the board down before applying the graphic will produce better results
- Use spray adhesive to hold the stencil in place (ensuring it doesn’t shift)
- When painting, use long, even strokes
- Wait for the design to completely dry, then remove the stencil.
Coating The Board For Protection
When your graphic is dry, it’s important to protect it with a clear coat finish. Before coating the board, sand down any rough areas.
- Consider using a clear lacquer or epoxy finish
- Prioritize even application of the finish, to prevent any bubbles or air pockets
- Give the finish sufficient time to dry completely before using the board.
Designing a longboard from scratch is a fascinating process that requires attention to detail and skill in graphic design. Combining the unique design with a stylish finish will give you a customized longboard that stands out from the crowd.
Conclusion
Making a longboard out of wood is not only a fun project, but it can also be an excellent way to save money. As with any diy project, it requires patience, attention to detail, and a little bit of creativity.
Remember to select the right wood, cut it precisely, and sand it down smoothly. Also, keep in mind that safety is essential, so take all the necessary precautions when using power tools. Finally, don’t forget to apply a protective finish to protect the wood and enhance its durability.
By following these steps, you can create a beautiful and functional longboard that will serve you for years to come. So, grab your tools, and have fun making your wood longboard!