To make longboard slide gloves, you will need to gather materials and follow a specific process. In this article, we will provide you with a step-by-step guide to make longboard slide gloves that will help you protect your hands while riding your longboard.
Longboard sliding is a fun and adventurous activity, but it can also be dangerous if you’re not fully prepared. Slide gloves are an essential accessory for any longboarder who wants to perform slides and tricks safely. They help to protect your hands from abrasions, cuts, and bruises, as well as provide better grip and control on your longboard. Rather than purchasing slide gloves, why not make them by yourself? It’s a great way to save money and customize your gloves to match your personal style. With the right materials and a simple process, anyone can make longboard slide gloves. Let’s dive in!

Credit: stokedrideshop.com
Materials Needed
Are you ready to take your longboarding game to the next level? Longboard slide gloves are essential gear that every longboarder should have. These gloves protect your palms while allowing you to maintain grip on the road, helping you pull off those sick slides.
Making your own longboard slide gloves is a great way to save money and customize your gear. Here’s a list of the materials you’ll need to get started.
List Of All The Materials Needed To Make Longboard Slide Gloves
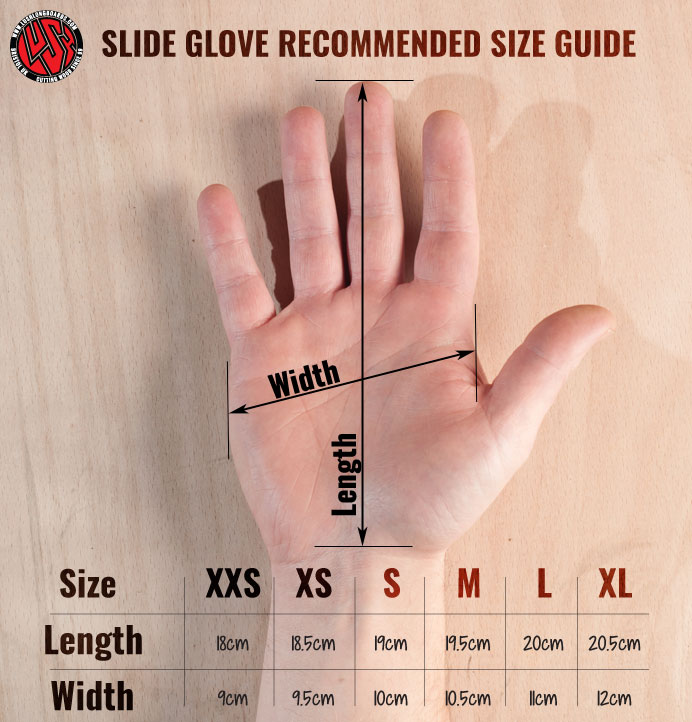
- Leather gloves: choose a pair of sturdy leather gloves that fit your hands snugly. Look for gloves with a bit of padding on the palm and fingers.
- Cutting board: you’ll need a cutting board to protect your work surface while cutting the plastic for the slide pucks. Use a cutting board that you don’t mind getting scratched up.
- Plastic sheet: you’ll need a sheet of plastic to make the slide pucks. Look for a material that is thick enough to protect your gloves but thin enough to be flexible. High-density polyethylene (hdpe) is a good choice.
- Puck template: you’ll need to create a template for your slide pucks. You can either make your own template or use one that you find online. Print out the template and cut it out.
- Marker: you’ll need a marker to trace the puck template onto the plastic sheet.
- Scissors: you’ll need a pair of scissors to cut out the slide pucks.
- Hole punch: you’ll need a hole punch to make holes in the slide pucks for the bolts that will attach them to the gloves.
- Bolts: you’ll need bolts to attach the slide pucks to the gloves. Choose bolts that are long enough to go through the gloves and slide pucks with a bit of room to spare.
- Nuts: you’ll need nuts to secure the bolts in place. Choose nuts that fit the bolts you have selected.
Explanation Of What Each Material Is Used For
- Leather gloves: the gloves will protect your hands while you’re longboarding. The leather is a durable material that will withstand wear and tear from sliding.
- Cutting board: the cutting board will protect your work surface while you’re cutting the plastic for the slide pucks. It’s important to protect your work surface to avoid damaging it.
- Plastic sheet: the plastic sheet will be cut into slide pucks that you will attach to the gloves. The plastic is a slick material that will allow you to slide smoothly.
- Puck template: the puck template will help you create slide pucks that are the right size and shape. You can find templates online or make your own.
- Marker: the marker will be used to trace the puck template onto the plastic sheet. Make sure you use a marker that is visible on the plastic.
- Scissors: the scissors will be used to cut out the slide pucks from the plastic sheet. Make sure the scissors are sharp so you can make clean cuts.
- Hole punch: the hole punch will be used to make holes in the slide pucks for the bolts that will attach them to the gloves. Make sure the hole punch is the right size for the bolts you’ve selected.
- Bolts: the bolts will be used to attach the slide pucks to the gloves. Make sure the bolts are long enough to go through the gloves and slide pucks with a bit of room to spare.
- Nuts: the nuts will be used to secure the bolts in place. Make sure the nuts fit the bolts you’ve selected so they won’t come loose.
Now that you have all the materials you need, you’re ready to start making your own longboard slide gloves. With these gloves, you’ll be able to slide like a pro and protect your hands at the same time. Happy longboarding!
Step-By-Step Instructions
Longboard slide gloves are an essential accessory for every longboarder. They offer crucial protection and control while performing sliding techniques. However, buying a brand new pair of gloves can be quite expensive. So why not make your own gloves instead?
Here’s a step-by-step guide on how to make longboard slide gloves from scratch.
Explanation And Instructions On How To Create The Base Of The Glove
- To create the base of the glove, you will need a pair of gloves made of durable material such as leather or synthetic leather.
- Cut off the fingertips of the gloves, leaving only the palm and wrist area.
- Cut a small slit near the base of the wrist area to allow room for the pucks to be attached later.
Diy Tips And Suggestions
- Use a thicker glove material to ensure maximum durability and protection.
- Try adding additional padding to the gloves using foam or felt.
How To Choose The Correct Type Of Pucks For Your Longboard Slide Gloves
- When choosing pucks, consider their shape, size, and material.
- Pucks made of either uhmw (ultra high molecular weight) plastic or delrin are two of the most common materials used.
- Look for a puck shape that has a beveled edge to make sliding more efficient.
Types Of Pucks Available And Their Features
- Round pucks are ideal for beginners and allow for smoother transitions during sliding.
- Rectangular pucks offer more control and precision when sliding but can be more challenging to use.
- Custom-shaped pucks can be made to suit individual needs and slides.
Step-By-Step Instructions On How To Attach The Pucks To The Gloves Securely
- Align the pucks with the glove and mark the attachment points with a pen or marker.
- Use a heavy-duty adhesive such as shoe goo or e6000 to attach the pucks to the glove.
- Allow the adhesive to dry for at least 24 hours before using.
Tips On Proper Placement And Alignment
- Position the pucks on the gloves at a comfortable and natural angle for sliding.
- Ensure that both gloves have the pucks aligned and positioned at the same angle.
Explanation Of The Importance Of Adding Grip To Your Longboard Slide Gloves
- Adding grip to the gloves will provide better control over longboard slides.
- Without grip, the pucks can shift, causing the slide to be less smooth or, even worse, causing sudden slides.
Step-By-Step Instructions On How To Add Grip To The Gloves
- Apply grip tape to the palm area of the gloves.
- Use a precision knife to cut off any excess tape, ensuring that the edges are smooth.
Diy Tips And Suggestions
- Try using different colors and textures of grip tape to add a personal touch to your gloves.
- Experiment with different grip placement to find the best position for your needs.
How To Add Personal Touches And Customizations To Your Longboard Slide Gloves
- Consider adding decorative patches or logos to the gloves.
- Dye the gloves to create a unique color pattern.
- Use paint or fabric markers to add creative designs to the gloves.
By following these simple steps, you can create your very own pair of longboard slide gloves that are tailored to your specific needs and preferences. Not only will you have a unique accessory, but you’ll also save money in the process.
Happy sliding!
Making a Cheap Set of Slide Gloves
Conclusion
Making your own longboard slide gloves is easier than you might think. With the right materials and a little bit of patience, you can create gloves that suit your needs perfectly. Whether you’re a beginner or an experienced rider, having gloves that allow you to carve, slide, and brake safely is crucial.
Not only will making your own gloves save you money in the long run, but it also gives you the opportunity to personalize them with your own design. Remember to prioritize safety and choose materials that are durable and protective.
With the right tools and a willingness to learn, you can craft a pair of gloves that will enhance your longboarding experience and keep you safe while cruising down the streets or bombing hills. So, why wait? Get started and make your dream gloves today!


