
To stop on a longboard, lean back and use your back foot to drag on the ground. Practice this technique at slow speeds before attempting at higher speeds or on steeper hills.
Longboarding is an exhilarating experience, but it can also be dangerous if you don’t know how to stop properly. Whether you’re a beginner or an experienced rider, it’s crucial to master the art of stopping on a longboard. Learning how to stop will not only prevent accidents but also give you confidence and control over your board. There are several techniques you can use to stop on a longboard, but the most fundamental method is to use your back foot to drag on the pavement. In this article, we’ll discuss how to stop on a longboard and some tips for practicing this skill.

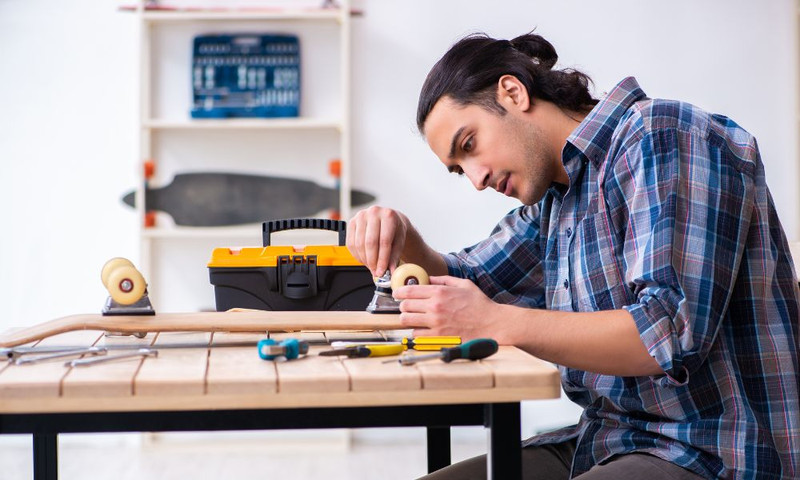
Credit: www.ridingboards.com
Safety First: The Importance Of Protective Gear
Longboarding is an exciting way to move around while enjoying fresh air, exercise, and the scenery. However, learning how to stop on a longboard can be tricky and even dangerous if you lack the proper gear. Therefore, before trying any stopping techniques, it’s crucial to prioritize safety and make sure you have the right gear.
Here are the different types of protective gear you need for longboarding:
- helmet – your head is the most vulnerable part of your body, which is why wearing a helmet is essential. Make sure your helmet fits snugly and has a sturdy outer shell to protect your head from any impact.
- knee and elbow pads – when learning how to stop on a longboard, you are likely to fall, and your knees and elbows will hit the ground. Therefore, it’s crucial to wear knee and elbow pads to prevent any injury.
- wrist guards – falling can also cause you to put your hands out and brace yourself, making wrist guards another crucial gear to avoid any sprain or fracture.
Emphasizing why wearing gear is crucial for safely learning and practicing stopping techniques:
- Protective gear not only reduces the severity of injuries but also gives you peace of mind when you practice stopping techniques.
- Without proper gear, any fall can result in severe head or body injuries leading to prolonged hospitalization and medical bills.
- Beginners should use all protective gear while learning how to stop on a longboard, as it builds confidence in their abilities, allowing them to hone their longboarding skills without the fear of getting hurt.
Protective gear is critical for safety, allowing longboarders to enjoy the sport with confidence and peace of mind. With the right gear in hand, beginners can focus more on practicing their stopping techniques and avoid any potential injuries, making it a fun-filled experience.
Foot Braking: A Great Beginner Stopping Technique
Longboarding is not just a hobby; it’s an art. It’s the perfect combination of skill and balance that thrill-seekers crave. But, safety is crucial while longboarding, especially when it comes to stopping. Foot braking is one of the first stopping techniques every beginner ought to learn.
This technique uses the sole of your shoe to slow or stop the longboard. In this post, we’ll explain how foot braking works and provide you with simple steps to perform it.
Explain What Foot Braking Is And How It Works
Foot braking involves putting your foot on the ground and applying pressure to slow down or stop the board. It’s a standard technique used by skateboarders, longboarders, and other riders to slow down without requiring a specific stopping location. This technique works when the rider shifts their weight onto their front foot, lifts their back foot, leans back slightly, and drags the sole along the ground to generate friction.
This will slow you down, ensuring a safe and steady stop.
Detail Step-By-Step Instructions On How To Perform Foot Braking
Foot braking may seem daunting, but it’s a simple technique that you can master with practice.
- Step 1: look ahead and ensure there’s no one ahead of you
- Step 2: keep your front foot firmly on the board
- Step 3: shift your weight to your front foot and lift your back foot off the board
- Step 4: lean back slightly while extending your back foot
- Step 5: place your sole on the ground, ensuring there’s enough pressure for traction
- Step 6: use your shoe’s sole to slow down or stop the board
- Step 7: once you have slowed down, put your back foot back on the board
Include Tips On How To Improve Foot Braking Technique
Foot braking is a fundamental technique that can easily be improved.
- Start slowly: foot braking is all about controlling your speed and momentum. Start slowly and build up your confidence before going faster.
- Master balance and stability: keep your knees bent and center your weight over the board. This will give you better stability and balance while foot braking.
- Use the ball of your foot: if you’re having trouble foot braking, try using the ball of your foot instead of the sole. This will provide more control and pressure.
- Shift your weight gradually: don’t shift your weight suddenly, as it may throw you off balance. Shift your weight gradually while foot braking.
- Keep practicing: like any skill, practice makes perfect. Keep practicing to improve your foot braking technique.
Foot braking is a fundamental and crucial skill in longboarding. By following the above steps and tips, you can improve your foot braking technique and ensure a safe and steady stop every time.
Do this to fix a slow longboard
Sliding: An Advanced Stopping Technique
Longboarding can be a fantastic sport when it’s done safely, and one of the most important skills to master is how to stop effectively. Foot braking is the most common method riders use to slow down, but it can sometimes be insufficient.
Fortunately, there is an alternative technique that can help you control your speed and come to a smooth stop: sliding. In this section, we will introduce sliding as an alternative to foot braking, describe the different types of slides, teach you how to perform a basic slide, and offer tips for improving your sliding technique.
Introduce Sliding As An Alternative To Foot Braking
Sliding is a longboarding technique that involves deliberately causing your board to lose traction and slide sideways. This process reduces your speed and helps you make sharp turns or stop when necessary. It is an advanced skill that requires practice and experience, but it is an effective alternative to foot braking.
If you’re interested in boosting your longboarding skills, sliding is a great technique to learn.
Describe The Different Types Of Slides And When Each Is Appropriate To Use
There are several types of slides that longboarders use for different purposes. Each slide offers unique advantages, and knowing which one to use in a particular situation can help you improve your overall performance.
- Stand-up slide – this is the most classic slide, and it involves shifting your weight to the back of the board, turning your shoulders, and pushing the board sideways with your feet.
- Hands-down slide – this slide involves placing one hand on the ground and using it as a pivot point to push your board sideways. This slide is great for controlling your speed while maintaining grip on your board.
- Coleman slide – this slide is similar to the stand-up slide, but it involves rotating your body 180 degrees while sliding. This slide is useful for stopping and changing direction quickly.
- Pendy slide – this slide involves sliding the board with only the back wheels and is usually faster than other slides. This slide is best for experienced riders who are comfortable with speed.
Provide Step-By-Step Instructions On How To Perform A Basic Slide
Here are the basic steps for performing a stand-up slide:
- Start by riding your board at a comfortable speed and shifting your weight to the back foot.
- Turn your shoulders to face the direction you want to slide.
- With your front foot, push the board forward while using your back foot to push it sideways.
- Keep your weight on your heels and maintain your balance by keeping your arms straight out to your sides.
- Once the slide is complete, regain your balance by shifting your weight to the front foot and continue riding.
Offer Tips For Improving Sliding Technique
Here are some tips for improving your sliding technique:
- Start slow – it’s best to practice sliding at slow speeds until you feel comfortable with the technique. Gradually increase your speed as you gain more experience.
- Practice with more experienced riders – riding with more experienced longboarders can help you learn new techniques and improve your sliding skills.
- Stay relaxed – sliding can be intimidating, but it’s essential to stay relaxed while doing it. Tensing up can compromise your balance and make you more likely to fall.
- Wear appropriate protective gear – falling is an inevitable part of learning to slide, so make sure you wear proper protective gear, including a helmet, knee pads, and elbow pads.
Sliding is an advanced longboarding technique that can be an effective alternative to foot braking. By understanding the different types of slides, learning how to perform a basic slide, and following the tips for improving your technique, you can boost your longboarding game and become a more skilled rider.
Other Stopping Techniques To Consider
Longboarding is a fun and exciting way to travel and enjoy the outdoors. However, stopping on a longboard can be challenging, especially for beginners. While the footbrake method is the most popular way to stop on a longboard, there are other techniques that you should consider to become a versatile rider.
In this post, we’ll discuss other less common stopping techniques such as revert, powerslide, and emergency stops, explaining when and how to use each technique, and note any potential risks or downsides.
Revert
Revert is a trick that involves turning your board 180 degrees without coming to a stop. This technique is useful when you need to change your direction or when you want to lose speed quickly.
- Start riding in a straight line at a moderate speed.
- Look over your shoulder towards the direction you want to turn.
- Keep your weight on your front foot and lift the back wheels off the ground.
- Twist your upper body and shoulders in the direction you want to turn.
- Use your front foot to push your board in the opposite direction.
- As the board completes the 180-degree turn, plant your back foot on the ground and ride away.
Revert delivers a quick and effective way to lose speed and change direction, making it an essential technique for advanced riders. However, reverting at high speeds may result in speed wobbles, which can cause you to lose control and fall.
Powerslide
A powerslide is a braking technique that involves sliding your board’s wheels perpendicular to your direction of travel. Powerslides are effective in reducing speed quickly and safely, making them a crucial technique for downhill riding.
- Start riding at a moderate speed on a smooth, flat surface.
- Shift your weight to your back foot, bending your knees slightly.
- Turn your shoulders and upper body in the direction you want to slide.
- Push your front foot forward and slide the wheels.
- Use your back foot to keep your board from sliding too far.
Powerslides are an effective way to slow down quickly, making them ideal for downhill riders. However, it can be challenging to execute a perfect powerslide, and if done incorrectly, the wheels may lock up, causing you to slide uncontrollably, resulting in a fall.
Emergency Stops
Emergency stops are techniques that are only used in life-threatening situations when you need to come to an immediate stop to avoid collisions or other dangers.
- Footbrake: this technique involves dragging your back foot on the ground while riding to come to a stop quickly. It’s a simple technique that every rider should master.
- Roll-off: this technique involves jumping off your board and allowing it to continue rolling in the direction of travel. If done correctly, your board will slow down and stop naturally.
Although emergency stops are essential, they should only be used in life-threatening situations. Improper use of these techniques may cause injury, and riders must always wear a helmet and other protective gear to minimize the risks.
Other stopping techniques, along with the conventional footbrake, are essential for longboarding. While revert, powerslide and emergency stops require time and practice to master, they are beneficial in improving your longboarding skills and overall experience. Practice these techniques in a safe environment and always use protective gear to minimize the risks of injuries.
Conclusion
As you have learned from this guide, stopping on a longboard is not as difficult as it seems. With the proper techniques and equipment, it is possible to come to a complete stop without putting yourself in any risk. Remember that mastering these techniques takes time and practice, so be patient and take things slowly.
Don’t rush to learn everything at once and always prioritize your safety. By following these steps, you will be able to confidently ride and stop on your longboard. So, get out there and keep practicing until you are a pro at stopping smoothly and safely.
Happy longboarding!